Il restauro del mobile
|
|
|
The planes and scrapers
|
||||||||||
|
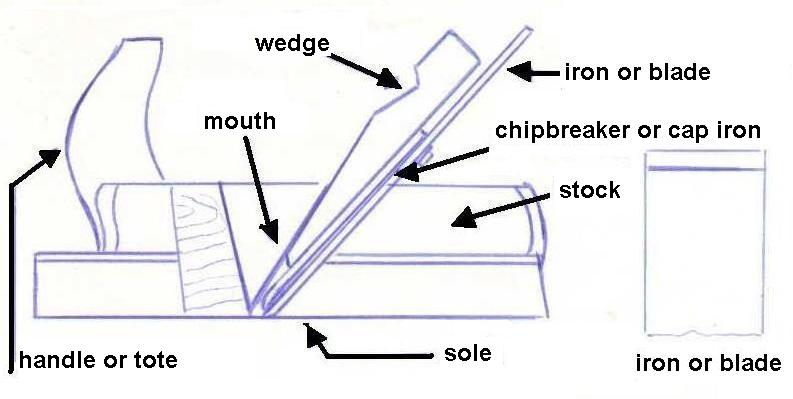
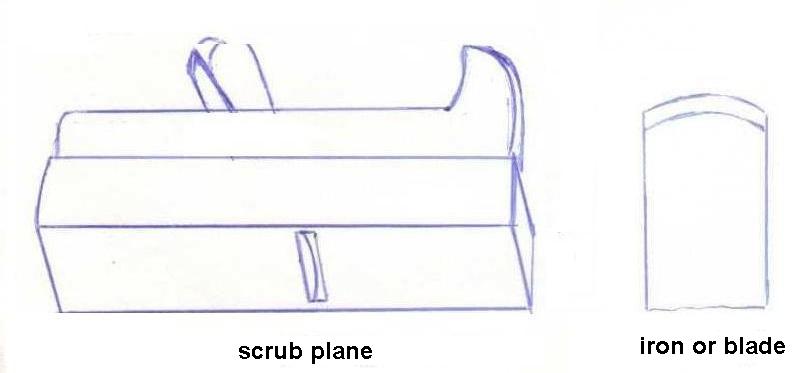
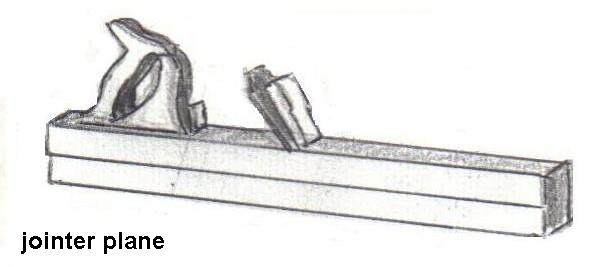
Types of planes
The planes are sharp blades inserted into a guide, made of very hard wood or metal.
We can distinguish between:
Adjusting the cutting edge
The amount of wood removed in the form of chips, depends on how the protruding edge of the blade is, compared to the sole. The adjustment of the cutting is done differently for the planes with wooden body and metal; in the first, to increase the depth of cut, you will have to turn the plane upside down and give a firm stroke with a hammer at the end of the iron, In doing so, you must check that the edge of the blade protrudes uniformly from one to two tenths of a millimeter for harder woods and from two to three tenths of a millimeter for for softer woods, (fig. 9). To ensure perfect parallelism of the edge of the blade, respect the sole, it may be necessary to hit on the side of the cutting edge, opposite to the one that protrudes less. To reduce the depth, it is necessary to knock on the rear of the stock, (fig. 10). As the cutter has been adjusted to the desired depth, to lock it in the right position you will give blows to the wedge, as long as this has not fixed enough. Because in doing so, it is possible that the blade moves a little bit, it may be necessary to repeat the whole process several times before you get the desired result. Instead, in the metallic ones, the adjustment of depth, can be obtained with extreme precision, by the rotation of the knob, and the parallelism, acting on the lateral adjustment ever.
Maintenance
As for sharpening the blade, refer to the discussion in relation to the chisels, indicating that the sharpening angle must be between 25 ° and 30 ° ( chisels ). Since with the use, the wooden sole tends to wear out unevenly, occasionally it is necessary to rectify it, using another hand plane or an electric plane.
The scrapers
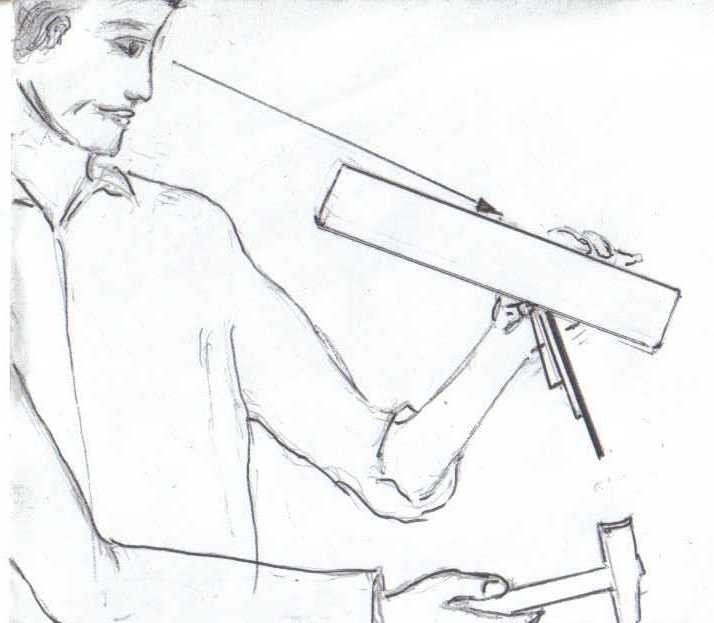
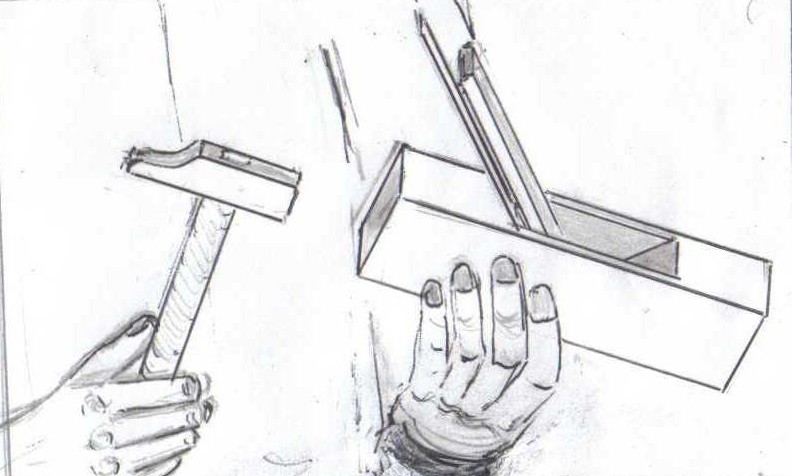
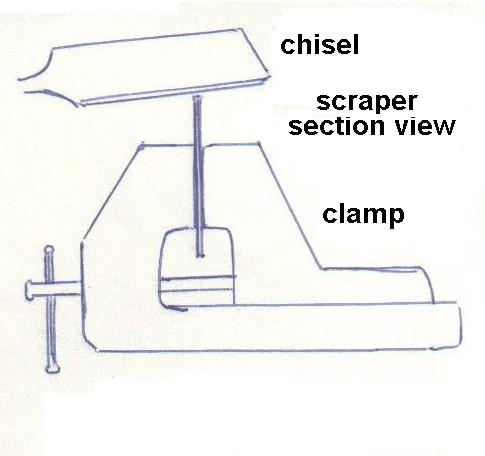
Consists of small pieces of steel of about 1-2 mm in thickness, the size of 6 cm to 12 cm. To sharpen them, first you need to pass the narrow borders on the grindstone, till they become sharp and square, then the flat parts to remove burrs. In Figure 11a we see, enlarged, what should be the result. Subsequently, in order to make a new burr, the tool is fixed on a clamp, then you pass a burnisher, (of round or triangular section), very firmly onto the scraper, pushing it along the edge two or three times. If you don't have a burnisher, the work can be done in this way: holding a chisel of high quality with the back upward, you pass it's edge on the cutting edge of the scraper, with an angle just less than 90 degrees, (fig. 12a, 12b and 12c) The final result, can be seen in Fig.11b.
|
fig. 1 |
|||||||||
|
fig. 2
|
fig. 3 |
|||||||||
|
fig. 4
|
fig. 5
|
|||||||||
|
fig. 6 |
fig. 7
|
|||||||||
|
fig. 8
|
||||||||||
|
fig. 9
|
fig. 10
|
|||||||||
|
||||||||||
|
fig. 12b
|
fig. 12c
Are you a restorer, a carpenter, a craftsman of
wood or an antique dealer or a private person and would like to submit
your work or sell furniture or antiques, or sell items, equipment and
materials for carpenters and restorers?
Register on the site and enter your free ads.
|
|||||||||